
Happy Thanksgiving!!
Gobble, gobble, gobble!! I have been cooking Thanksgiving dinner for over twenty years and I have had my fair share of "wish I would have done this differently" and "I will never do that again" moments. I am going to share some of my tips and tricks for a flavorful, moist, and tasty bird that everyone is sure to love.
How to pick out a turkey
The first step in preparing a turkey for Thanksgiving, or any occasion, is to determine the number of guests you will be serving. The rule of thumb is to allow for one and a half pounds of raw turkey per person. For example, if you are feeding 6 people then you would want a turkey that is at least 9 pounds. However, if you want leftovers, then multiply by closer to 3 per guest to ensure leftovers for everyone.
If you are feeding 20 people, you will want at least a 30-pound turkey. Now that is a very large bird and while you can certainly cook a 30-pound bird, it will take most of the day and not allow very much room in the oven for cooking your sides dishes. To combat this, I would suggest having two smaller birds. You could cook two 15-18-pound birds, have leftovers, and they would not take near the amount of time to cook.
Once you know how big a bird you need, you can purchase one (or more) at the store but keep in mind that most turkeys will come frozen. Make sure to place the turkey(s) directly into the freezer upon returning home.
How to thaw a turkey
There are three methods for thawing a turkey: The Refrigerator Method, The Cold-Water Method, and The Microwave Method.
| Turkey Weight | Refrigerator Method | Cold Water Method |
| 8 - 10 pounds | 1.75 - 2.25 days | 4 - 5 hours |
| 10 - 12 pounds | 2.25 - 2.75 days | 5 - 6 hours |
| 12 - 14 pounds | 2.75 - 3.25 days | 6 - 7 hours |
| 14 - 16 pounds | 3.25 - 3.5 days | 7 - 8 hours |
| 16 - 18 pounds | 3.5 days - 4 days | 8 - 9 hours |
| 18 - 20 pounds | 4 days - 4.5 days | 9 - 10 hours |
| 20 - 22 pounds | 4.5 days - 4.75 days | 10 - 11 hours |
| 22 - 24 pounds | 4.75 days - 5.25 days | 11 - 12 hours |
Refrigerator
The most common method for thawing a turkey is the Refrigerator Method. With this method you will need to allow 24 hours for every 4-5 pounds of bird.
This method is the safest and most preferred method as it keeps the bird at 40 degrees or below to prevent the spread of bacteria that can lead to foodborne illnesses.
Cold-Water
The Cold-Water method is a convenient way of thawing the turkey as it takes much less time to thaw. So, if you forgot to take it out of the refrigerator or bought it at the last minute, this method will help the bird to thaw quickly.
For this method you are going to leave the turkey in the original packaging and place in the sink or a large bowl. You will cover the bird with cold water so that it is completely submerged in water. Next, set a timer and change the cold-water out every 30 minutes until the bird is completely thawed. This method takes about 30 minutes per pound. Once the bird is thawed, prepare your turkey and cook immediately to prevent the spread of any foodborne illness.
Microwave
The Microwave Method is the least common method of thawing because most turkeys will not fit into a microwave. Furthermore, you will end up with some parts over thawed (or partially cooked) and some parts still somewhat frozen. If using this method, you will need to cook the turkey immediately to prevent any foodborne illness. This method is not recommended because of the risk of foodborne illness.
Do NOT thaw the turkey on the kitchen counter. The turkey will not evenly thaw which causes some parts to become warmer resulting in the possible spread of bacteria. To prevent this, keep the turkey out of the danger zone which is between 40 degrees and 140 degrees Fahrenheit.
How to prep a turkey
Once the turkey is thawed, it is time to start prepping him. Here is how I prep my turkey.
- Preheat the oven to 375 degrees so that it is ready and waiting for you and not the other way around.
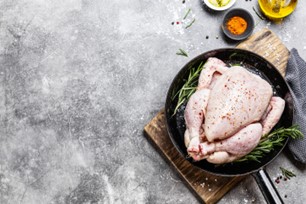
- Prepare all your vegetables for the turkey such as onions, garlic, and celery by cleaning and cutting down to preferred size.
- Have your butter softened because it will be too cold to work with straight from the refrigerator. The desire is for it to be a nice, soft consistency that is spreadable and easy to work with.
- Have your herbs/spices, and flavorings ready to go. You can either mix these in with the butter and spread them all at once or spread your butter and then sprinkle on the seasonings. I have done it both ways and each works fine, just a matter of preference.
- Now that all your other ingredients are ready to go, it's time to prep the turkey himself. Here is the link to my favorite poultry seasoning. https://www.amazon.com/Spice-Hunter-Poultry-Seasoning-1-1-Ounce/dp/B0001M11TG?ref_=ast_sto_dp&th=1
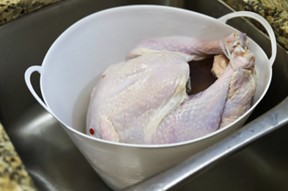
- Take your completely thawed turkey and place him in a clean and empty sink. Using kitchen scissors or a knife, remove the turkey from his packaging while making sure to take note the weight, as you will need that for later.
- Remove the neck and giblet packages from the turkey. I also like to spread his wings and legs to loosen him up a bit. Run warm water over and inside the bird while making sure to get any little pockets of ice that may still be in him. Make sure to have your roasting pan nearby and then transfer him to the roasting pan.
- Use paper towels to pat him dry. If he is not dried off then the butter will not stick to the skin.
- *Make sure you properly clean and sanitize your sink and anything else that has the turkey has touched to prevent the spread of bacteria and foodborne illness. Wash hands for at least 20 seconds. *
- Once the turkey is dry and, in the pan, you can start adding all your veggies and seasonings. I add half the vegetables to the bird himself and the other half into the pan under the bird with a drizzle of olive oil. Season the inside of the bird with seasonings (I use salt, pepper, granulated garlic powder, granulated onion powder, and poultry seasoning*). *
- *Try to have all your seasonings ready to go or have someone else season while you hold the turkey to prevent cross contamination to all your spice bottles. Anytime you touch the turkey be sure to wash your hands for at least 20 seconds to prevent the spread of bacteria. I cannot stress this enough because no one wants salmonella, clostridium perfringens, or campylobacter for Thanksgiving. *
- Spread the butter and seasonings all over the bird making sure to get it down by his wings, thighs, and legs. This results in a beautiful brown skin and flavorful bird.
- Many people will tie the birds' legs together, I prefer not to do this step because I find that the inner thighs cook more evenly when they are not squished against the body.
- He is now ready for the oven!
How to cook a turkey
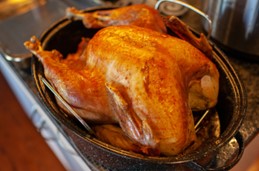
I like to start out roasting the turkey at 375 degrees Fahrenheit for 15-20 minutes to start the browning process. Then turn the heat down to 325 degrees Fahrenheit to cook for the remainder of the time. Pour some turkey stock over the turkey and bottom of pan to keep it moist and prevent burning.
The general rule for cooking time is 15 minutes for each pound of an unstuffed bird. Please see the chart below.
| Turkey Weight | Cooking Time | Servings |
| 8 - 10 pounds | 2 hours - 2 hours 30 minutes | 5.5 - 6.5 |
| 10 - 12 pounds | 2 hours 30 minutes - 3 hours | 6.5 - 8 |
| 12 - 14 pounds | 3 hours - 3 hours 30 minutes | 8 - 9.5 |
| 14 - 16 pounds | 3 hours 30 minutes - 4 hours | 9.5 - 10.5 |
| 16 - 18 pounds | 4 hours - 4 hours 30 minutes | 10.5 - 12 |
| 18 - 20 pounds | 4 hours 30 minutes - 5 hours | 12 - 13.5 |
| 20 - 22 pounds | 5 hours - 5 hours 30 minutes | 13.5 - 14.5 |
| 22 - 24 pounds | 5 hours 30 minutes - 6 hours | 14.5 - 16 |
*All cooking times are based off 350 degrees Fahrenheit. If cooking at 325 like I do, you may have to cook a little bit longer. *
How to baste a turkey
Every half hour, baste the turkey with some broth. I like to use turkey stock as it has the most flavor. Pour a little over the turkey to help him stay nice and moist.
How to tell when the turkey is done

When the turkey looks like he is done. Take him out of the oven. Test the thickest part of the breast and the inner- most part of the thigh (thickest part). The temperature needs to register at 165 degrees Fahrenheit or higher (not too much higher because we want him moist and juicy, not dry*) for at least 15 seconds. Also, the juices will run clear when the bird is done (Not red like blood). Cover the turkey with foil for 30 minutes and let him rest while working on the remainder of the meal.
How to carve a turkey
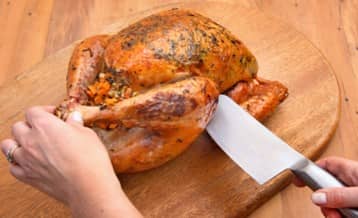
Once the turkey is done resting (do not skip this step because it will help the turkey to retain the juices and be moist) move him to a cutting/carving board.
First remove the legs and thighs at the inner thigh bone.
Then separate the thighs from the legs. I leave these pieces on the bone and let the guests eat around the bone. Arrange on the serving platter.
Next, remove the breast by slicing next to the breast bone and removing the entire breast. Then cut into thin slices and arrange on the serving platter.
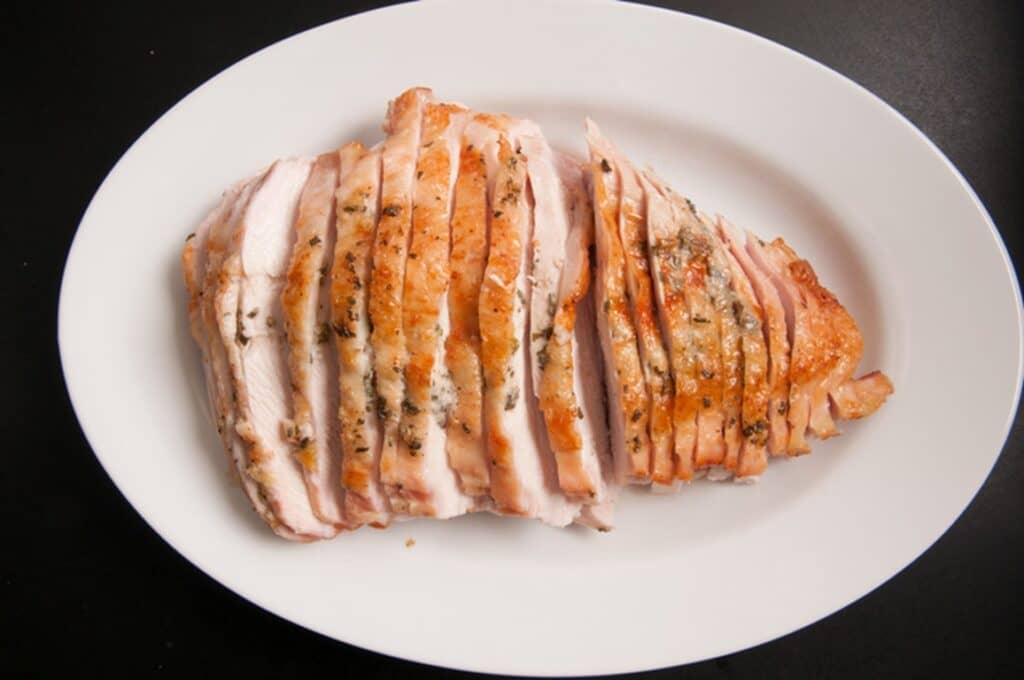
At this point, you should be left with the turkey carcass and back meat. You can remove this meat from the turkey as well and add it on the serving platter.
Once the meal is complete and the carcass has cooled, I remove the rest of the remaining meat and place it and any leftover turkey from the platter in a food storage container.
All leftover turkey should be consumed, placed in the freezer, or disposed of within 3-4 days after cooking to prevent foodborne illness.
*If your turkey came out on the dry side, then no worries! You can still fix it. Instead of carving the turkey at the dinner table, (which I never do because it is easier to do in the kitchen) carve it in the kitchen. Pour some turkey stock in a casserole dish. Then, slice your turkey just as you would if you were serving it and place it in the stock in the casserole dish. Place it in the oven for a few minutes to warm through. Finally, remove the turkey from the oven and place him on your platter and voila, you have a moist turkey.
*Pictures are not my own, they are simply there to give you an idea of what each step should look like. I will update the guide next year with my own photos that I take at this year's Thanksgiving.*

Leave a Reply